
Sure, here is a blog post about how to frame a football shirt, designed to be informative, detailed, and SEO-friendly, while maintaining high readability.
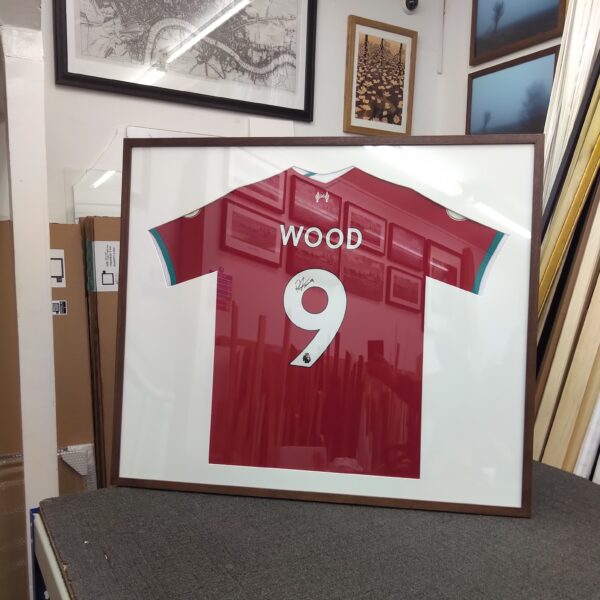
Image Source: www.sohoframes.co.uk
How Do I Frame A Football Shirt? Easy Guide
Can you frame a football shirt? Yes, you absolutely can frame a football shirt, and it’s a fantastic way to preserve and display a treasured piece of sports memorabilia. Whether it’s a signed jersey from your favourite player, a shirt from an iconic match, or a beloved team kit from your youth, framing transforms it into a stunning piece of wall art and a conversation starter. This guide will walk you through the entire process, from choosing the right frame to securely mounting your football jersey display. We’ll cover everything you need to know for a professional-looking football jersey display, whether you’re tackling it yourself or considering professional sports memorabilia framing services.
Why Frame Your Football Shirt?
A football shirt is more than just fabric; it’s a tangible link to memories, emotions, and passion. Framing your football shirt elevates it from a folded item in a drawer to a cherished display piece. It protects it from dust, fading, and damage, ensuring its longevity. A well-framed shirt can become the centrepiece of a sports-themed room, an office, or even a living space, showcasing your dedication to the sport and your favourite team. It’s a way to immortalize a special moment, a victorious season, or a personal connection to the game.
Deciding on Your Framing Style
There are several popular ways to frame a football shirt, each offering a different aesthetic. The best choice depends on the shirt itself, the significance of any accompanying items (like a signed football or match ticket), and your personal taste.
1. The Classic Mount and Frame
This is the most straightforward approach. The shirt is typically folded or carefully arranged and mounted onto a backing board. A mat board with a window cut to fit the shirt is then placed over it, followed by the frame and glass. This method highlights the shirt itself, with the matting providing a clean, defined border. It’s excellent for showcasing the main design and any prominent logos or numbers.
2. The Shadow Box Football Shirt
For a more dimensional and dynamic presentation, a shadow box is ideal. This type of frame has a deeper profile, allowing the shirt to be mounted in a more three-dimensional way. You can fold the shirt to showcase specific elements, or even display it fully extended. Shadow boxes are perfect for framing a signed jersey if the signature is raised or if you want to include other flat memorabilia like tickets, photographs, or even a small replica trophy. This method offers a truly immersive football jersey display.
3. Full Display with Accessories
This approach goes beyond just the shirt. It involves creating a narrative within the frame, incorporating other items related to the shirt or the game it represents. Think of framing a signed jersey alongside a photo of the player, a match ticket, a small piece of turf, or even a replica medal. This is where custom shirt framing truly shines, allowing for a deeply personal and informative display.
Essential Materials for Framing Your Football Shirt
Before you start, gather all the necessary supplies. Having everything on hand will make the process smoother and more enjoyable.
Frame Selection
- Type of Frame: Consider wood, metal, or acrylic frames. Wood offers warmth and a classic feel, while metal provides a modern, sleek look. Acrylic can be lightweight and less prone to breakage, but can scratch more easily.
- Frame Depth: If you’re opting for a shadow box football shirt, ensure the frame has sufficient depth to accommodate the mounted shirt without crushing it.
- Frame Width: A wider frame can be more impactful for a large jersey, while a narrower one might suit a more minimalist aesthetic or smaller shirts.
Mounting Materials
- Backing Board: Acid-free foam core or conservation board is crucial. This prevents the shirt from yellowing or deteriorating over time.
- Mounting Board (Mat Board): Acid-free mat board is used to create the border around the shirt. Choose a colour that complements the shirt and your décor.
- Adhesives: Use only archival-quality tapes and glues. Double-sided acid-free tape, photo corners, or spray adhesives are suitable options. Avoid regular tapes, as they can damage the fabric over time.
Glass or Acrylic
- Standard Glass: Affordable and clear.
- UV-Protective Glass/Acrylic: Highly recommended, especially for signed jerseys or shirts in bright locations. This protects the fabric and any signatures from fading due to sunlight.
- Non-Reflective Glass/Acrylic: Reduces glare, allowing for a clearer view of the shirt from different angles.
Tools
- Sharp Scissors or Craft Knife: For cutting mat board and backing.
- Ruler or Measuring Tape: For accurate measurements.
- Pencil: For marking.
- Gloves: To avoid transferring oils from your hands to the shirt.
- Frame Saw or Miter Box (if cutting your own frame): For precise frame angles.
- Staple Gun (optional, for securing fabric backing): Use with caution.
- Screwdriver and Picture Hanging Hardware: For mounting the finished piece.
Step-by-Step Guide: Mounting a Football Shirt
Here’s a detailed breakdown of how to mount your shirt. This process is fundamental to any successful football jersey display.
Step 1: Prepare Your Shirt
- Cleanliness is Key: Ensure the shirt is clean and dry. If it’s a cherished jersey, consider professional dry cleaning that specializes in delicate fabrics or sports memorabilia.
- Ironing (Optional and with Caution): If the shirt is very wrinkled, you can iron it on a low setting with a pressing cloth. Be extremely careful not to melt any printed names, numbers, or sponsor logos, especially if they are plastic-based. Test on an inconspicuous area first.
Step 2: Plan Your Layout
- Positioning: Lay the shirt flat on a clean surface. Decide how you want it displayed. Do you want it fully extended, folded to highlight the crest, or showing off a specific number or signature?
- Sizing the Mount: Measure the shirt once you’ve decided on its final folded or arranged position. This will help you determine the size of your backing board and mat opening.
Step 3: Cut the Backing and Mat Board
- Backing Board: Cut the acid-free backing board to the size of your frame or slightly larger than the area the shirt will occupy.
- Mat Board: If using a mat, measure the shirt’s intended display area and mark the dimensions for the window opening on the back of the mat board. Use a ruler and craft knife to carefully cut out the window. Precision here is important for a professional look. For a shadow box football shirt, you might not need a mat, or you might opt for a smaller, decorative mat.
Step 4: Mount the Shirt
This is the most crucial step for securing your football jersey display.
-
Method 1: Using Archival Tape/Photo Corners:
- Lay the backing board down.
- Carefully position the shirt on the backing board as desired.
- Using acid-free double-sided tape or photo corners, attach the shirt to the backing board. Apply the tape discreetly to the inside of the collar, along seams, or on the back of the fabric where it won’t be visible. For photo corners, slide the edges of the shirt into the corners.
- Ensure the shirt is taut but not stretched, and that all the key features are visible.
-
Method 2: Stitching (Advanced)
- This method offers the most secure and often the most professional finish.
- Using a fine needle and archival thread (or even fishing line for strength), carefully stitch the shirt to the backing board.
- Stitches should be placed along internal seams or the back of the fabric, making them invisible from the front. Small, discreet stitches are best. This is particularly useful for framing a signed jersey where you want absolute security.
-
Method 3: Using a Stretched Fabric Backing (for Shadow Boxes)
- If using a shadow box, you might choose to stretch the shirt over a shaped piece of foam core that fits snugly inside the box.
- This is akin to stretching a canvas for painting. You’ll carefully fold and secure the fabric to the back of the foam core using staples or strong archival tape. This gives a very clean, taut finish.
Step 5: Assemble the Frame
- Place Mat (if using): If you have a mat board, carefully place it over the mounted shirt, aligning the window with the shirt.
- Clean the Glass/Acrylic: Clean both sides of the glass or acrylic thoroughly to remove any dust or smudges.
- Position the Shirt and Backing: Place the mounted shirt (with or without mat) onto the glass/acrylic inside the frame.
- Secure the Backing: Place the frame’s backing board (or the combined backing/shirt assembly) into the frame. Secure it using the frame’s built-in clips, tabs, or by carefully re-nailing or stapling the backing board to the frame. If you are framing a treasured football shirt, ensure this step is done securely.
Step 6: Add Hanging Hardware
- Attach Hooks/Wire: Install appropriate picture hanging hardware on the back of the frame. D-rings and picture wire are common and strong. Ensure the hardware is rated to hold the weight of your framed shirt.
Framing a Signed Jersey: Special Considerations
Framing a signed jersey requires extra care to protect the precious signature.
- UV Protection: Always opt for UV-protective glass or acrylic. This is paramount to prevent the ink from fading.
- Avoid Direct Contact: Ensure the signature does not touch the glass. If it’s a raised signature, the depth of a shadow box is beneficial. If the signature is flat, a well-cut mat can keep it from making contact.
- Archival Quality: Every material used should be acid-free and archival. This includes the backing board, matting, and any adhesives. This is crucial for preserving the signature’s integrity.
- Consider Professional Framing: For high-value signed jerseys, it’s often worth the investment to use a professional sports memorabilia framing service. They have specialized knowledge and materials to ensure the best possible preservation and presentation.
Sports Jersey Framing Cost: What to Expect
The cost of framing a football shirt can vary significantly depending on the complexity of the design, the quality of materials used, and whether you do it yourself or hire a professional.
DIY Framing Costs
- Frame: $30 – $100+ (depending on size, material, and style)
- Matting & Backing: $20 – $50 (for acid-free materials)
- Glass/Acrylic: $20 – $80+ (especially for UV-protective or non-reflective options)
- Hardware: $5 – $15
Total DIY Cost: $75 – $245+
This is a rough estimate. You can find more affordable frames at craft stores or online retailers, but always prioritize archival quality for the mounting materials.
Professional Framing Costs
Professional custom shirt framing can range from $200 to $600 or more. This price reflects:
- Expertise: Skilled framers know how to handle delicate fabrics and valuable items.
- High-Quality Materials: Professionals use museum-quality, acid-free materials.
- Custom Design: They can help you design a unique and visually appealing football jersey display.
- Precision Craftsmanship: The cutting, mounting, and assembly are done with meticulous accuracy.
- Specialty Glass: Access to a wider range of UV-protective and anti-reflective options.
When comparing sports jersey framing cost, consider the value of the shirt and the desired longevity of the display.
Choosing the Right Frame for Your Football Jersey Display
Selecting the perfect frame is crucial for the overall impact of your football jersey display.
Material and Finish
- Wood: Available in various species (oak, maple, cherry) and finishes (painted, stained). Offers a classic, warm aesthetic.
- Metal: Aluminium or steel frames are sleek and modern, often thinner than wood. Good for minimalist displays.
- Acrylic: Clear, lightweight, and shatter-resistant, but can scratch easily. Can give a contemporary, almost invisible look.
Colour Palette
- Match the Team Colours: Using the team’s primary or secondary colours in the matting or frame can tie the display together beautifully.
- Neutral Tones: White, black, grey, or cream mats provide a timeless and elegant backdrop that allows the shirt to be the focal point.
- Contrast: A contrasting colour can make the shirt pop. For example, a dark blue shirt might look striking against a white mat and a black frame.
Size and Proportions
- Frame Size: The frame should be proportionate to the shirt. A large shirt in a small frame can look cramped, while a small shirt in a huge frame can get lost.
- Mat Width: A wider mat can add a sense of luxury and give the shirt breathing room. A narrower mat offers a more understated look.
Creating a Shadow Box Football Shirt
A shadow box offers a unique way to display your football shirt, allowing for depth and the inclusion of extra memorabilia.
The Process for a Shadow Box:
- Choose a Deep Frame: Select a shadow box frame with enough depth to accommodate your shirt without it being compressed against the glass.
- Mounting Surface: You’ll likely use a foam core or a rigid backing board that fits inside the shadow box.
- Stretching the Shirt: As mentioned earlier, stretching the shirt over the backing board (often called “French cleating” or “float mounting” if it’s meant to appear suspended) creates a clean, taut look. This might involve careful stitching or strong archival tape applied to the back.
- Adding Accessories: Mount photos, tickets, or other items around or behind the shirt using archival tape or photo corners. You might create small compartments within the shadow box for these items.
- Assembly: Carefully place the mounted shirt and accessories into the shadow box, secure the backing, and close the frame.
This method is excellent for framing a signed jersey if you want to protect the signature while also displaying it prominently.
Displaying Your Framed Football Shirt
Once framed, think about where and how to hang your creation.
- Location: Choose a spot away from direct sunlight to prevent fading, especially if your shirt is signed. Avoid areas with high humidity or extreme temperature fluctuations.
- Wall Mounting: Use appropriate wall anchors and screws for the weight of the framed shirt. Ensure it’s hung level.
- Height: Hang it at eye level for comfortable viewing. The centre of the frame should typically be around 57-60 inches (145-152 cm) from the floor.
- Lighting: Consider adding accent lighting (like a picture light) to highlight your framed jersey, but be mindful of heat if using incandescent bulbs. LED lights are a cooler, safer option.
Common Pitfalls to Avoid
Even with the best intentions, some mistakes can affect your football jersey display.
- Using Acidic Materials: Regular cardboard, tape, or glue can cause irreversible damage to the fabric and any signatures. Always use archival-quality materials.
- Direct Sunlight Exposure: This is the fastest way to fade colours and signatures.
- Over-Stretching the Fabric: This can distort the shirt’s shape and damage the fibres.
- Touching Signatures: Avoid touching signed areas with bare hands, as skin oils can degrade the ink. Wear gloves!
- Poor Quality Framing: A cheap, flimsy frame won’t adequately protect your shirt and might not look as good.
FAQ: Framing Your Football Shirt
Q1: How do I clean a football shirt before framing?
A1: Gently hand-wash the shirt in cool water with a mild detergent, or opt for professional dry cleaning. Ensure it is completely dry before framing.
Q2: Can I frame a football shirt myself?
A2: Yes, absolutely! With the right materials and a bit of care, you can achieve a professional-looking result at home.
Q3: What’s the difference between a standard frame and a shadow box for a football shirt?
A3: A shadow box has a deeper profile, allowing the shirt to be mounted with more dimension. It’s ideal for creating a 3D display or including additional memorabilia.
Q4: Is it necessary to use UV-protective glass?
A4: It is highly recommended, especially for signed jerseys or shirts displayed in sunny locations, as it protects against fading.
Q5: How much does professional custom shirt framing typically cost?
A5: Professional framing costs can range from $200 to $600+, depending on the complexity and materials used.
Q6: Can I frame a shirt with a player’s autograph?
A6: Yes, and it’s highly recommended to use UV-protective glass and archival-quality materials to preserve the autograph.
Q7: How do I make sure the shirt stays flat and doesn’t sag?
A7: Secure the shirt properly to the backing board using archival tape, photo corners, or stitching. For a taut finish, consider stretching it over a foam core board, especially for shadow boxes.
Framing a football shirt is a rewarding project that preserves a piece of sporting history and transforms it into a beautiful display. Whether you choose a simple mount and frame or a complex shadow box football shirt, taking the time to select the right materials and follow these steps will ensure your cherished football jersey display lasts for years to come. Happy framing!