
Framing a football shirt is a fantastic way to display your passion for the sport and honor a cherished piece of sports memorabilia. Can you frame a football shirt yourself? Yes, absolutely! This guide will walk you through the entire process, from selecting the right materials to the final wall mount. Whether it’s a classic jersey from your favorite team or a signed shirt from a legendary player, learning how to frame a football shirt will preserve it and turn it into a stunning piece of wall art. This DIY approach to sports memorabilia framing allows for a personalized touch, ensuring your football jersey framing project perfectly suits your style and your precious soccer shirt mounting.
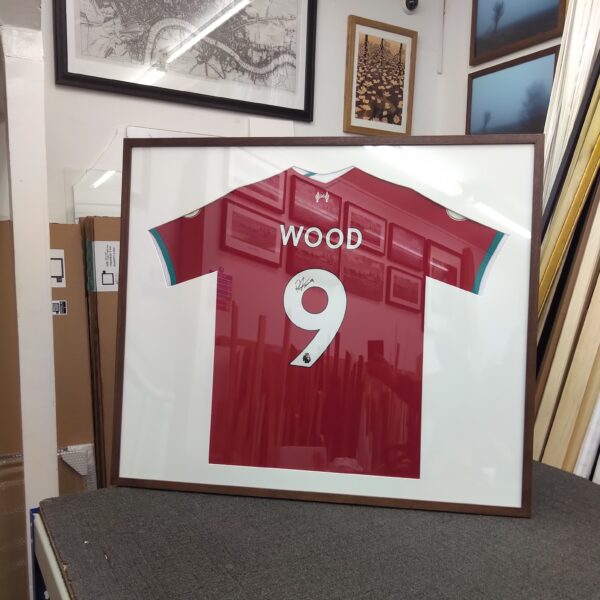
Image Source: www.sohoframes.co.uk
Why Frame Your Football Shirt?
Displaying your football shirt goes beyond just hanging it up. It’s about preserving a memory, celebrating a team, or cherishing a unique collectible. A well-framed shirt can become a focal point in any room, sparking conversations and evoking fond memories of matches, players, and victories.
Preserving Your Piece of History
Football shirts often carry significant sentimental value. They can represent a favorite player, a memorable season, or a championship win. Framing protects the fabric from dust, UV light (which can cause fading), and physical damage, ensuring your prized possession remains in excellent condition for years to come. This is a crucial step in sports memorabilia framing.
Elevating Your Decor
A framed football jersey is more than just fan gear; it’s a statement piece. It adds personality and a touch of athletic flair to your home or office. Imagine your favorite club’s colors or a legendary player’s name proudly displayed on your wall. It’s a much more impactful way to show your support than simply having the shirt in a drawer.
Creating a Custom Display
DIY framing gives you complete control. You can choose the frame style, matting, background, and even add elements like ticket stubs or photos to create a truly custom sports frame. This personalization makes the display uniquely yours, transforming a simple garment into a bespoke piece of art.
Gathering Your Materials: The Essential Toolkit
Before you start, it’s vital to gather everything you’ll need. Having all your supplies ready will make the process smoother and more enjoyable.
The Frame: Choosing the Right Structure
The frame is the backbone of your display. You have several options:
- Ready-made frames: These are widely available and can be cost-effective. Look for frames specifically designed for shirts or large enough to accommodate one unfolded.
- Shadow boxes: Ideal for creating depth and allowing you to include additional items like photos, ticket stubs, or even a small plaque. A shadow box football display is very popular.
- Custom framing: For a truly unique and high-quality finish, consider custom framing. This allows you to select specific dimensions, materials, and styles to perfectly complement your shirt and decor.
The Mounting Board: Providing Support and Structure
This is what you’ll attach your shirt to inside the frame.
- Acid-free foam core board: This is the best choice as it won’t damage your shirt over time. It’s firm enough to hold the shirt in place.
- Cardboard or regular foam board: While cheaper, these can degrade over time and potentially damage delicate fabrics. Use with caution for valuable items.
Fastening Materials: Securing Your Shirt
You’ll need a way to attach the shirt to the mounting board.
- Archival-quality double-sided tape: Safe for fabrics and provides a strong hold.
- Fabric glue or spray adhesive (acid-free): Use sparingly. Ensure it’s specifically designed for fabric and archival use.
- Staples or pins: For a more traditional approach, you can use a staple gun or pins. However, ensure they are placed discreetly and are of good quality to avoid rust. This method requires careful planning on how to mount a shirt without visible damage.
Tools for the Job: Precision and Ease
- Measuring tape or ruler: For accurate placement.
- Scissors or a craft knife: For cutting materials.
- A clean, flat surface: Essential for working without creases.
- Gloves: To avoid transferring oils from your hands to the shirt.
- (Optional) Iron and ironing board: To gently press out any major creases before mounting.
Protective Elements: Keeping Your Jersey Safe
- UV-protective glass or acrylic: Protects the shirt from fading caused by sunlight.
- Mounting spray or adhesive (acid-free): If you choose to adhere the shirt directly to the board.
Step-by-Step Guide to Framing Your Football Shirt
Now, let’s get down to the practical steps of how to frame a football shirt.
Step 1: Prepare Your Football Shirt
Before you begin framing, it’s important to prepare the shirt itself.
- Cleaning: If the shirt is dirty, wash it according to the care label. Ensure it is completely dry before proceeding.
- Ironing (Optional): For a crisp presentation, you can gently iron the shirt. Use a low heat setting and consider placing a thin cloth between the iron and the shirt to prevent damage. Avoid ironing over any printed names or numbers if possible, or iron from the inside out. This helps to display the football shirt in its best possible form.
Step 2: Measure and Cut Your Mounting Board
Accuracy is key here. You need a mounting board that fits snugly inside your chosen frame.
- Measure the inside dimensions of your frame: Use a measuring tape or ruler to get the exact height and width.
- Transfer measurements to your mounting board: Mark the dimensions clearly.
- Cut the board: Use a sharp craft knife and a ruler for a clean, straight cut. Multiple passes with the knife are often better than trying to cut through in one go.
Step 3: Plan Your Layout and Mount the Shirt
This is where you decide how your shirt will be displayed. You can show it fully, folded, or even with a specific player’s name and number prominently featured.
Mounting Options:
- Full Display: Lay the shirt flat on the mounting board. Smooth out any wrinkles.
- Using Double-Sided Tape: Apply archival double-sided tape to the edges on the back of the shirt. Carefully place the shirt onto the mounting board, pressing down firmly.
- Using Pins/Staples: If you’re using pins or staples, gently stretch the fabric over the board and secure it discreetly on the back. For a clean look, you might only need to secure the shoulder and hem areas. This method is often used in sports memorabilia framing for a taut finish.
- Folded Display: Fold the shirt to highlight specific features, like the club crest or a player’s name and number. Secure it using the same methods as the full display, ensuring the folds are neat. This is a great way to frame a soccer jersey.
- Creased or Pleated Display: For a more dynamic look, you can create subtle pleats or creases in the fabric. Secure these in place with discreet pins or tape from the back. This is a common technique for soccer shirt mounting to add visual interest.
Additional Items:
If you are creating a shadow box football display, this is the stage to add other memorabilia.
- Placing Photos or Tickets: Use acid-free photo corners or double-sided tape to attach any photos, ticket stubs, or programs to the mounting board around the shirt.
Step 4: Assemble the Frame
Once your shirt is securely mounted on the board, it’s time to put it all together.
- Insert the mounting board: Carefully place the mounted shirt into the frame.
- Add the glass/acrylic: Place the UV-protective glass or acrylic on top of the shirt.
- Secure the backing: Fasten the frame’s backing board into place. Ensure it’s snug to keep everything in position.
Step 5: Finishing Touches and Wall Mounting
Your framed football shirt is almost ready for display!
- Clean the glass: Use a glass cleaner and a soft cloth to ensure the front of the frame is spotless.
- Attach hanging hardware: Most frames come with pre-attached hanging hardware. If not, ensure you attach a secure wire or D-rings suitable for the weight of your framed item.
- Choose a location: Select a spot on your wall where the shirt will be visible and safe from direct sunlight or moisture.
- Hang your masterpiece: Use a level to ensure your wall mount jersey is straight.
Advanced Techniques for Football Jersey Framing
For those looking to go the extra mile in their sports memorabilia framing, here are some advanced techniques.
Using a Mat Board
A mat board can significantly enhance the visual appeal of your framed shirt. It adds a border between the shirt and the frame, preventing the fabric from touching the glass directly and giving the display a more polished, gallery-like feel.
- Choosing the Right Mat: Select acid-free mat board. You can use a single mat, a double mat (two different colors), or even a custom-cut opening to highlight specific parts of the shirt.
- Cutting the Mat: This requires a mat cutter for precise cuts. Many framing shops offer custom mat cutting services if you prefer not to do it yourself.
- Attaching the Shirt to the Mat: This is often done using a V-groove technique or by sewing the shirt onto the mat using fine thread, creating a seamless look. This is a professional way to mount a shirt.
Incorporating Additional Memorabilia
A shadow box football display is perfect for showcasing more than just the shirt.
- Tickets and Programs: Place these strategically around the shirt, secured with acid-free tape or photo corners.
- Photos: Include action shots of the player or team, or even a photo of you at a game.
- Medals or Badges: If you have any related medals or badges, these can be mounted in the shadow box.
- Player Signatures: If the shirt isn’t signed, you could frame a signed photograph or card alongside it.
Protecting the Fabric: Long-Term Care
To protect your football jersey, consider these points:
- Avoid Direct Sunlight: Sunlight is the biggest enemy of fabric colors. Hang your framed shirt away from windows or use UV-protective glass.
- Humidity Control: Keep the framed shirt in a stable environment, avoiding areas with high humidity or drastic temperature changes.
- Regular Dusting: Gently dust the frame and glass with a soft cloth.
Popular Display Styles for Football Shirts
There are many ways to display your football shirt, each offering a unique aesthetic.
The Classic Full Shirt Display
This is the most common method, showcasing the entire shirt, often with the name and number clearly visible. It’s a straightforward approach to how to frame a football shirt.
The Player Focus Display
This style highlights a specific player. You might fold the shirt to prominently display the player’s name and number, perhaps accompanied by a photo of that player. This is a key aspect of sports memorabilia framing.
The Team Pride Display
Here, the focus is on the club’s crest and colors. You might choose matting or background fabrics that match the team’s colors. This is a vibrant way to frame a soccer jersey.
The Action Shot Display
This involves mounting the shirt alongside a dynamic photograph of a player in action, creating a narrative within the frame.
Frequently Asked Questions (FAQ)
Here are some common questions about framing football shirts.
Q1: What is the best way to protect a football jersey in a frame?
A: Use acid-free materials for the mounting board and any adhesives. UV-protective glass or acrylic is crucial to prevent fading from sunlight. Ensure the environment where you display the frame has stable humidity and temperature.
Q2: Can I frame a jersey without it touching the glass?
A: Yes, using a mat board is the most common way to create space between the shirt and the glass. Alternatively, you can use spacers within the frame, especially in shadow boxes, to achieve this.
Q3: How much does it cost to frame a football shirt?
A: DIY framing can range from $30 to $100 or more, depending on the materials you choose (frame, matting, glass). Professional custom framing can cost anywhere from $150 to $500+, depending on the complexity and materials.
Q4: What is the best way to mount a shirt for framing?
A: For a professional look and to preserve the fabric, consider sewing the shirt onto an acid-free backing board or using archival-quality double-sided tape discreetly on the back edges. Avoid using standard staples or tape directly on the fabric if possible.
Q5: Can I frame a signed football shirt?
A: Absolutely! A signed shirt is a valuable piece of memorabilia and framing is highly recommended to protect the signature and the shirt itself. Be extra careful not to obscure the signature.
Q6: How do I hang a framed football shirt on the wall?
A: Use appropriate wall anchors and hanging hardware that can support the weight of your framed shirt. Ensure the hardware is securely attached to the frame and the wall, and use a level to hang it straight.
By following these steps and tips, you can successfully frame your football shirt, creating a lasting tribute to your favorite sport and team. Enjoy your beautifully displayed piece of sports history!